
HOMEOPATHIC PUNCHED CARDS - Do it yourself
I have found that punched cards provide a simple solution to solve complicated cases in homeopathy. Its use is so simple that it has become a habit with me to solve each and every case, whether acute or chronic, with it. One can easily make one set for himself. The result arrived at by the use of punched cards is very close to the computerized result except that rubrics and remedies are limited.
Make Your own set of SPIRO Pocket Homeopathic Calculator Cards with the help of this tutorial For Images in Bigger size please scroll down to the appropriate section and see all the images from the gallery to help you Do it yourself.
Benefits of making your own set:
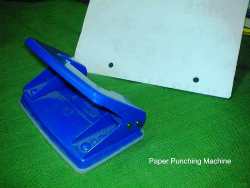
Fig. 25: Paper Punching Machine
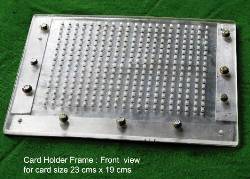
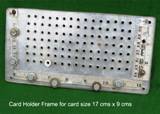
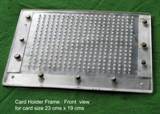
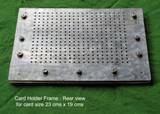
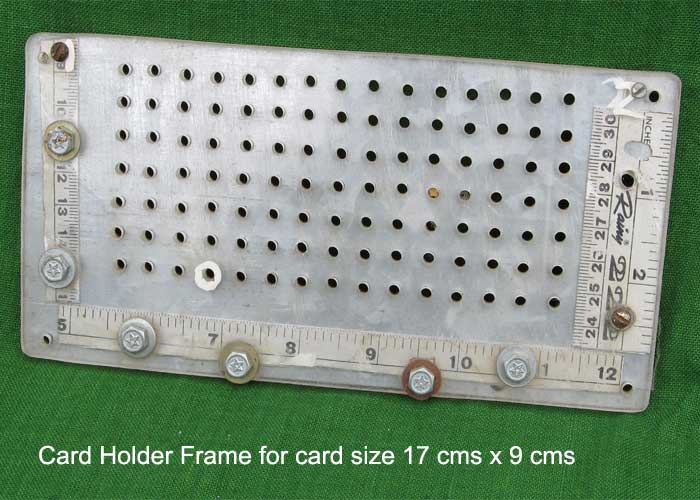
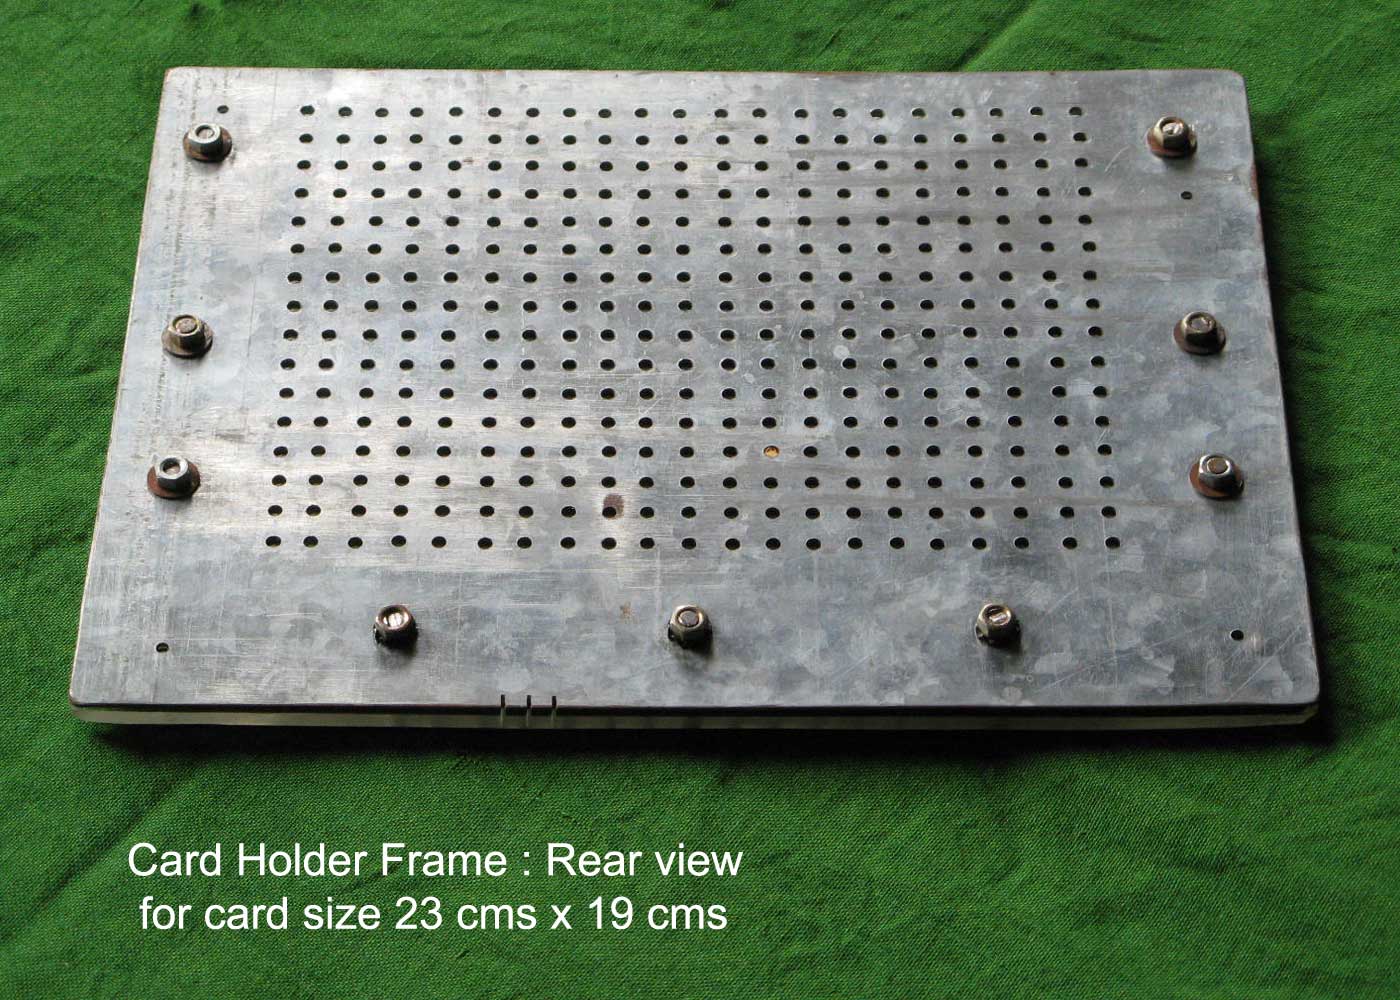
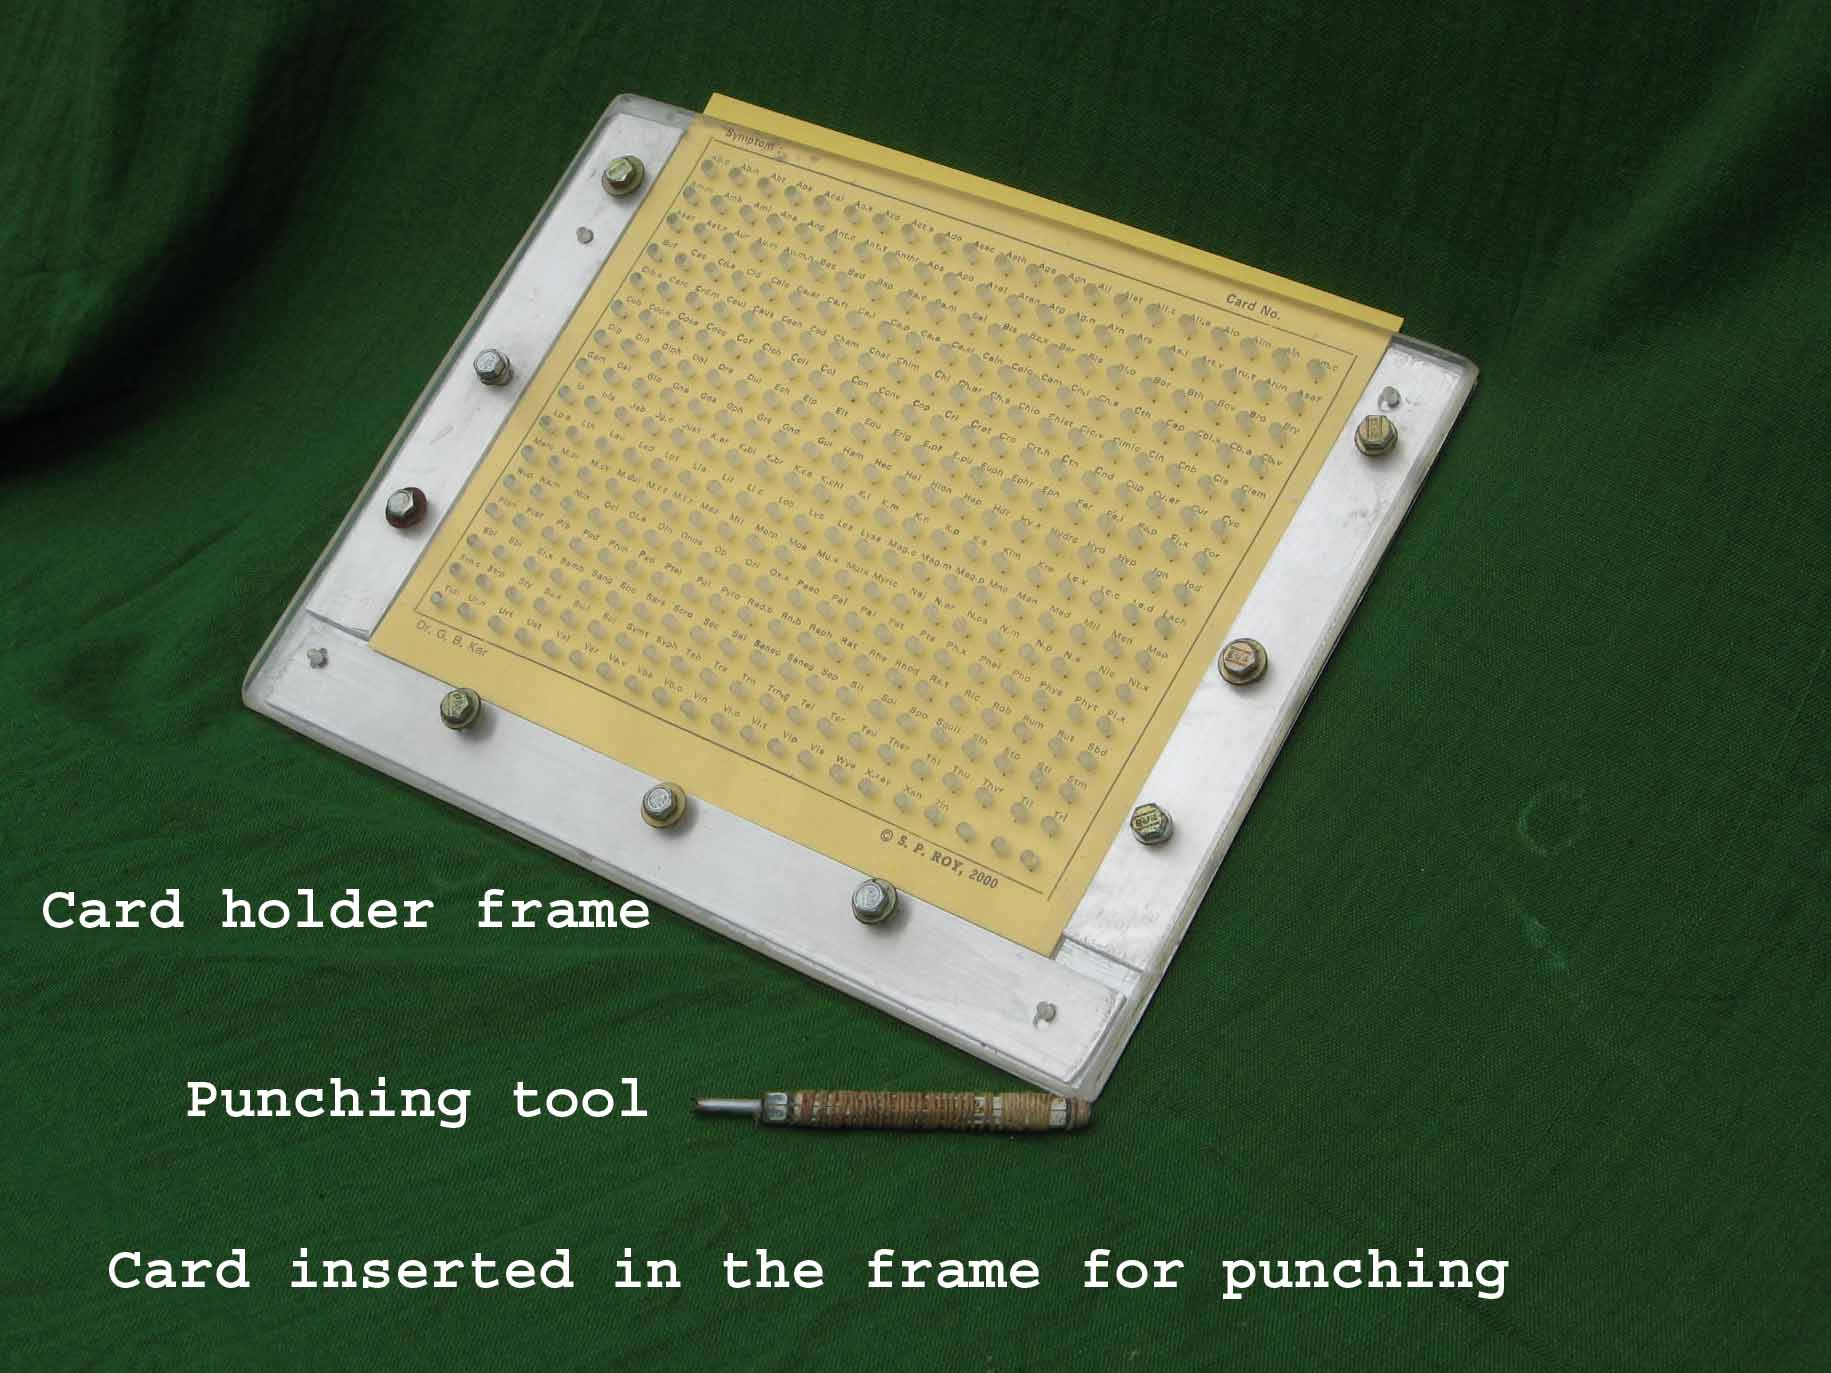
Fig. 16: Card Holder Frame
Making one’s own punched cards not only provides a useful tool to repertorise cases quickly but also teaches the person about symptoms and the related remedies, thereby expanding his Materia Medica knowledge. It is a well known fact that one learns and remembers more by ‘doing’ than by listening or reading.
If you make your own cards, there is no problem if one card is lost or damaged. You can make one yourself and replace. But if you buy ready made cards, the complete set becomes useless if one card is lost or damaged.
All homeopaths have their favorite group of remedies and symptoms. You can choose remedies and symptoms as per your requirement and not forced to follow someone’s choice. You can also make cards from one chapter and be a specialist in treating that condition. For example, you can choose skin, female, rheumatism, asthma, fever or some other chapter and make all cards related to that chapter so that you get a deeper understanding of the rubrics and remedies. This will help you handle those cases more effectively. Even though there is no specialization in homeopathy, still certain group of remedies and rubrics are effective in a particular condition and one can deal with that condition more effectively if he has a deeper knowledge in that chapter.
On this page, I am describing a method by which one can make his own homeopathic punched cards. The holes are made in the cards on the same principle as a paper punching machine, which is used in offices to make holes in papers shown in (fig.25). It takes only a small investment and a few days to make the cards yourself. The details about printing, making the Card Holder Frame, Punching Tool etc. are given in this article. The details are given for a card for 105 remedies. Material should be thicker for bigger cards. Photographs for bigger Card Holder Frame (fig.16) is shown which is self explanatory.
Step1: Deciding on the card size and printing.
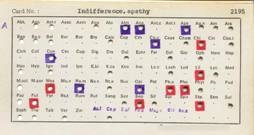
Fig. 11: A Punched Card
You can print 2 to 3 thousand cards. You should first make cards from ‘Generalities’ like hot, chilly, warmth agg. pressure amel., morning agg. etc. Then you can make cards from locations, especially pain at locations. It is better to choose large, general rubrics so that all remedies are included. You should observe what type of patients you are treating, which symptoms they are having and then make the cards. You can go on adding cards as you expand your practice. If you find that you are dealing with more rheumatic cases, then you should make cards on all rubrics related to this complaint. I have found that around 1000 cards are enough to deal with a large variety of cases.
Step 2: Fabrication of Card Holder Frame
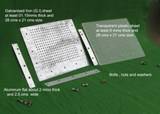
This work may be done before or after getting printed cards from the press. This step involves fabricating the Card Holder Frame for the cards. You need a G.I sheet (Galvanized Iron) of at least 1 mm thick, the thicker the better, but making holes in the thicker sheet is slightly more difficult. Please note that the sheet should not be stainless steel or other varieties of steel because holes cannot be drilled on those sheets by ordinary drill machines. The sheet should not be aluminum because this metal is softer than the Punching Tool and therefore the hole will become wider and holes will not be perfect after few cards are punched. For the card size 17 cms x 9 cms, the sheet size should be 20 cms x 10 cms. Shops do not sell such a small piece of sheet. You can get it from steel water tank makers or scrap dealers. Steel gate and door fabricators may help in this case. If more persons decide to make, then they can buy a large piece from a store.
The next material required is the clear plastic sheet called Perspex; widely used in decoration, sign board etc. This should be around 3mm thick or more and of same size as G.I sheet. The function of this transparent sheet is to show the remedy name on the cards where the hole is to be made and to guide the Punching Tool to move vertically. You should now cut both sheets to same size after fixing by nut and bolt. Any sheet metal mechanic or helper can do the job. Mechanics working in technical schools and colleges may also help.
The procedure is:
Step 2: Fabrication of Punching Tool.
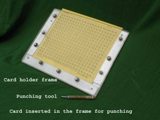
I made the punching tool from a motorcycle spoke. The spoke end should be sharpened with a small round file so that a channel-shape is created at the end. The diameter of the round file should be same or less than the spoke diameter. When this end is pushed inside the hole, with card inside frame, a round hole is made. The small rod can be pushed inside an old pen or some plastic or wooden rod to work as handle of the tool. I put it inside a use-and-throw ball-point pen. The Punching Tool is of same size for all card sizes. The diameter of the Punching Tool and the drill bit is 3 mms to 3.5 mms.
Some points to be noted before starting the job:
Diagrammatic Steps in Developing a Punched Card System
Click on the Image to see a Bigger and Clearer Image

Illustrative example:
I am giving one example of use of punched cards in practice. If we study the case studies of masters, we find that most of them considered ‘hot’ or ‘chilly’, and ‘desires’ and ‘aversions’ as ‘eliminating rubrics’. I invariably apply this hint in practice and get very good result. However, a lot of cross examination is required to establish that the symptoms are genuine. Most patients do not realize the importance of the ‘eliminating symptoms’ and answer casually that they ‘desire sweets’; but on cross examination clarify that they like sweets made from milk, not made from flour. I do not consider ‘Desires, sweets’ of use in such a patient. I consider the symptom ‘Desires, sweets’ if the patient enjoys the sweet taste irrespective the item. Similarly, in my area, I consider a patient to be ‘chilly’, if he can sleep comfortably during power failure in summer - without fan. Practical items of food and environmental conditions should be cited as examples to get the genuine symptoms from the patient. A person may like pickles but not tamarind. I do not consider such a person to have ‘Desires, sour’. Selecting and evaluating symptoms differ from person to person. I have given my way of collecting symptoms,
Case 1:
Let us take the case of a lady, my friend’s wife, who suffered from chronic headache for last 4 years. During one of my visit to their house she casually asked me if I could cure her headache. I said I could try. I found her to be chilly, craving sour foods and the pain was located on left side. If we combine three punched cards and hold one over the other in the above sequence corresponding to the three symptoms, we get the reading as follows.
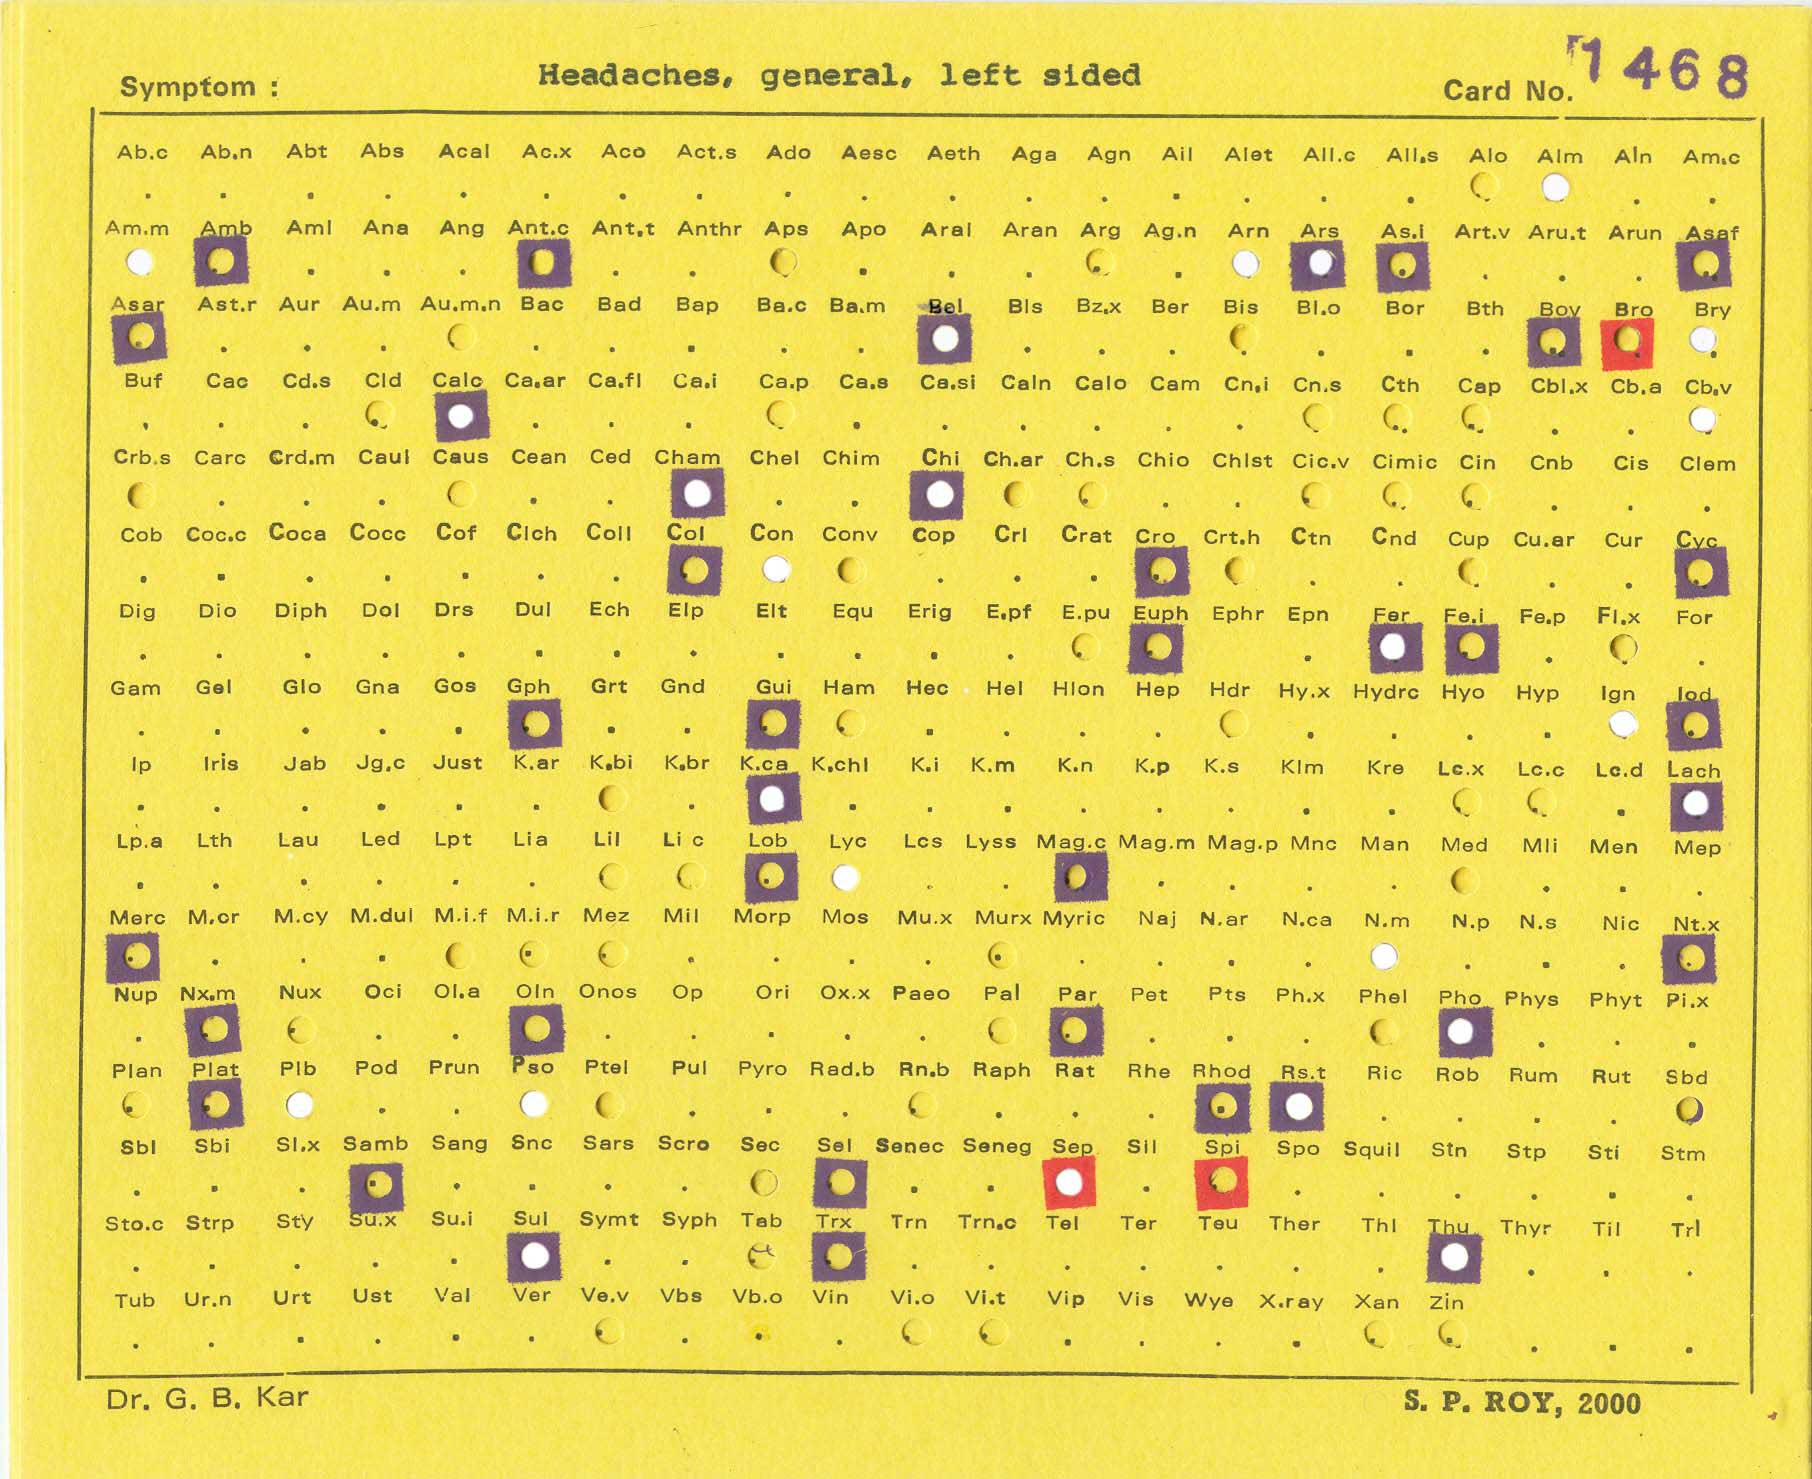
 If we hold the three cards against light “Fig.14”,we find that light is passing through 24 remedies; they are Alm., am.m., arn., ars.,bel,.bry,.calc,.carb. v.,cham., chin.,con., fer., ign., kali. carb., lach., lyc., nat.m., phos., plb., psor., rhus. tox., sep., sul., and thuj.
If we displace each card horizontally, say by 1mm, so that they are not in register“Fig.15”, we can calculate the weightage directly. Red stands for 3, blue for 2 and no color is 1.It may be noted that yellow is the base color of the card and has a value of 1. The result is Alm.3/3, am.m.4/3, arn.4/3, ars.6/3,bel,5/3.bry,5/3.calc,7/3,carb.v.5/3,cham.7/3, chin.5/3,con.5/3, fer.6/3, ign.6/3, kali. c.7/3, lach.6/3, lyc.4/3, nat.m.5/3, phos.5/3, plb.4/3, psor.4/3, rhus. tox.5/3, sep.8/3, sul.8/3, and thuj.4/3. I may add that if the case is repertorized by a computer, the result will be quite similar; you will find top 10 to 15 remedies will be from this 24 remedies group.
The colors red, red and blue attract your attention instantly and the highest scoring remedies are Sepia and Sulphur. I do not usually start the case with Sulphur.I gave her a single dose of Sepia 30.She had profuse discharge from the nose for 2 days and she was a completely changed lady within a week. My friend later told me that she has improved a lot in both mental, emotional and physical levels considerably. Her headache was gone 4 hours after taking the remedy.
Thousands of homeopathic doctors who are working sincerely are getting such results routinely. They do not have time to publish their results or boast their achievements in the seminars for which many patients are not able to contact them and get their help. Practice of homeopathy requires continuous study of classical literature, sincere effort, dedication, thorough case taking and analysis of failures. In my opinion, analysis of failures is the best teacher one can have. One analysis of a failed case will make the homeopath succeed in ten cases in the future. One can analyze his failures only if he works scientifically and systematically. Homeopathic punched cards are very useful to work this way.
I have found that punched cards provide a simple solution to solve complicated cases in homeopathy. Its use is so simple that it has become a habit with me to solve each and every case, whether acute or chronic, with it. One can easily make one set for himself. The result arrived at by the use of punched cards is very close to the computerized result except that rubrics and remedies are limited.
Make Your own set of SPIRO Pocket Homeopathic Calculator Cards with the help of this tutorial For Images in Bigger size please scroll down to the appropriate section and see all the images from the gallery to help you Do it yourself.
Benefits of making your own set:
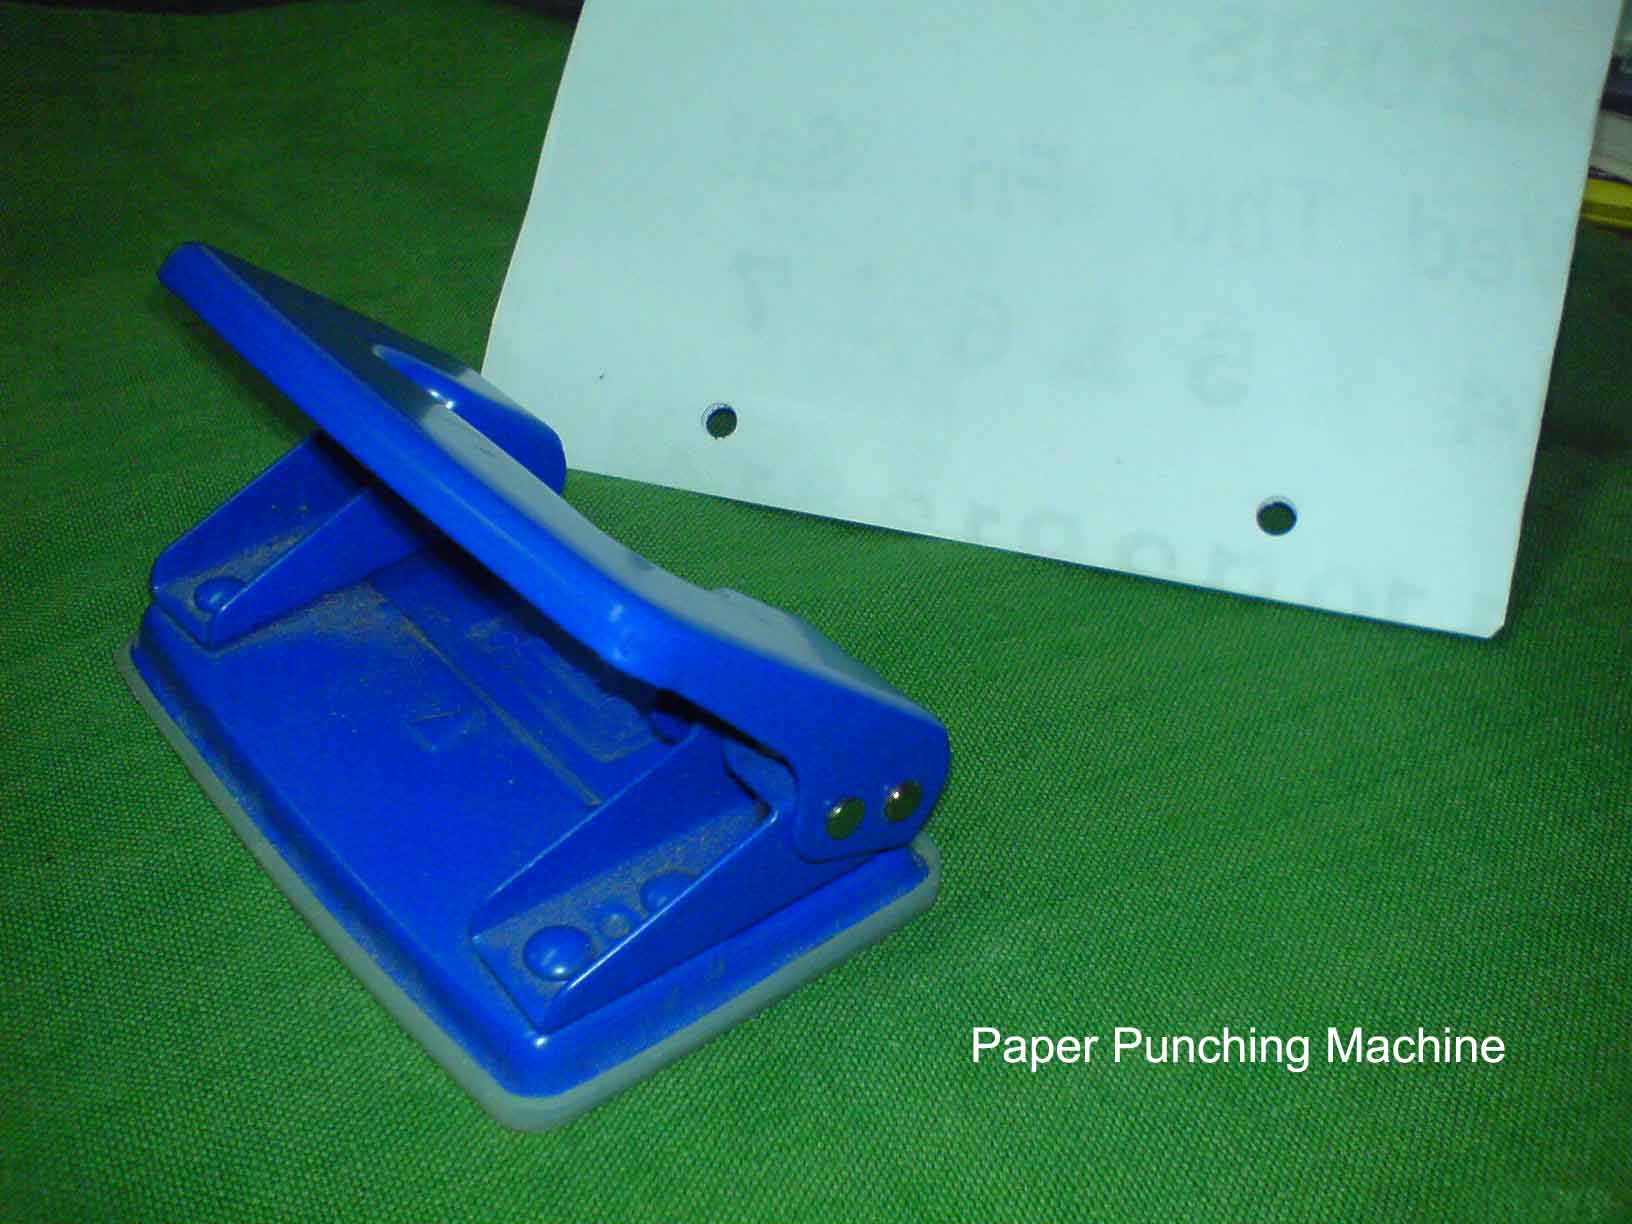
Fig. 25: Paper Punching Machine
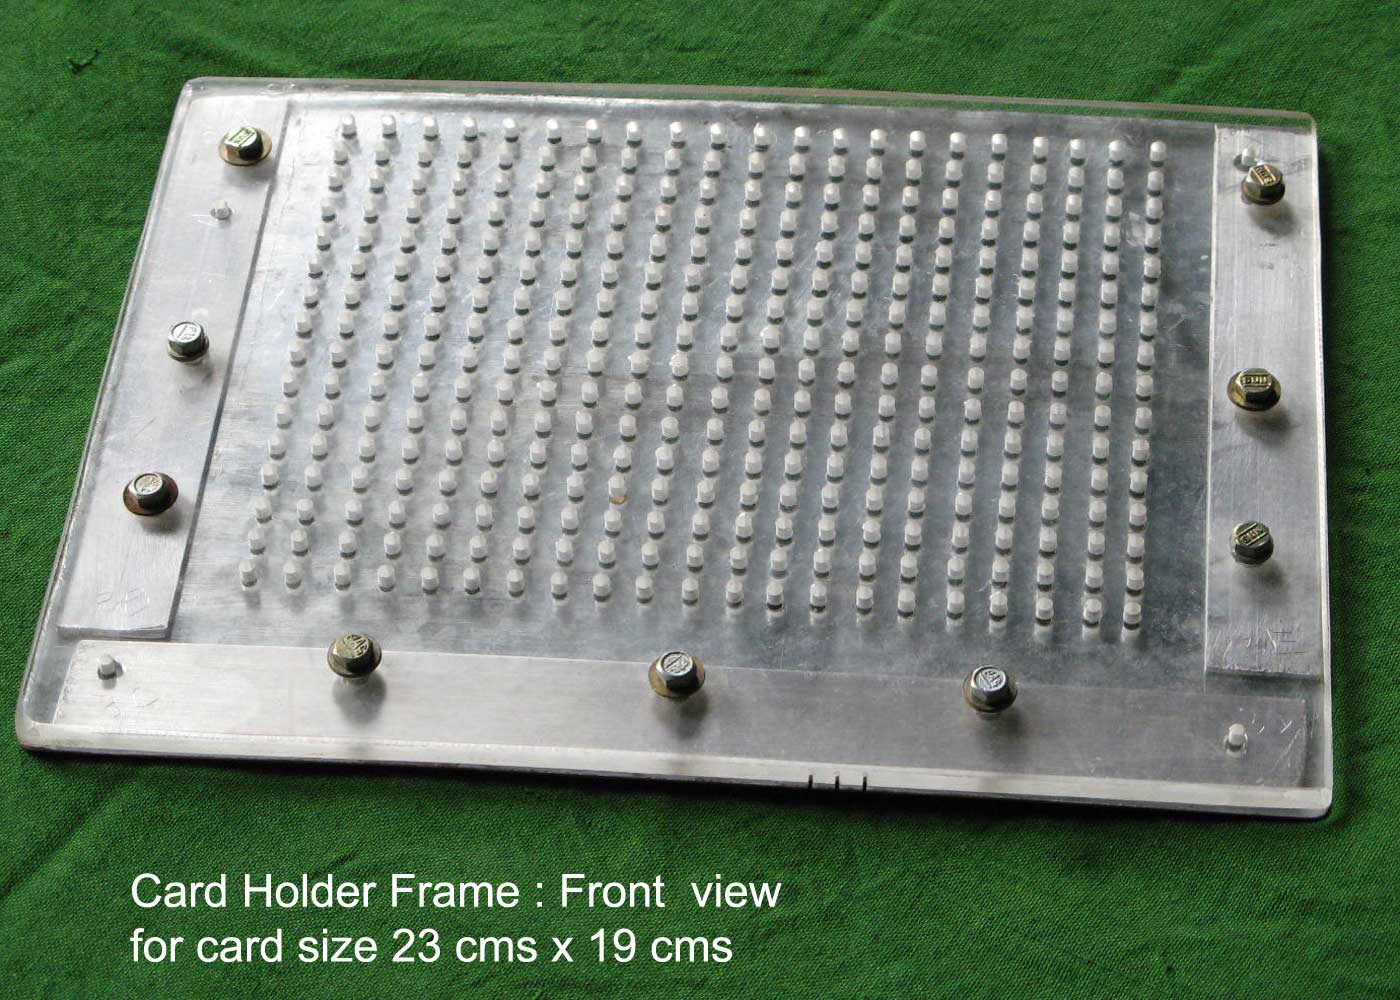
Fig. 16: Card Holder Frame
On this page, I am describing a method by which one can make his own homeopathic punched cards. The holes are made in the cards on the same principle as a paper punching machine, which is used in offices to make holes in papers shown in (fig.25). It takes only a small investment and a few days to make the cards yourself. The details about printing, making the Card Holder Frame, Punching Tool etc. are given in this article. The details are given for a card for 105 remedies. Material should be thicker for bigger cards. Photographs for bigger Card Holder Frame (fig.16) is shown which is self explanatory.
Step1: Deciding on the card size and printing.
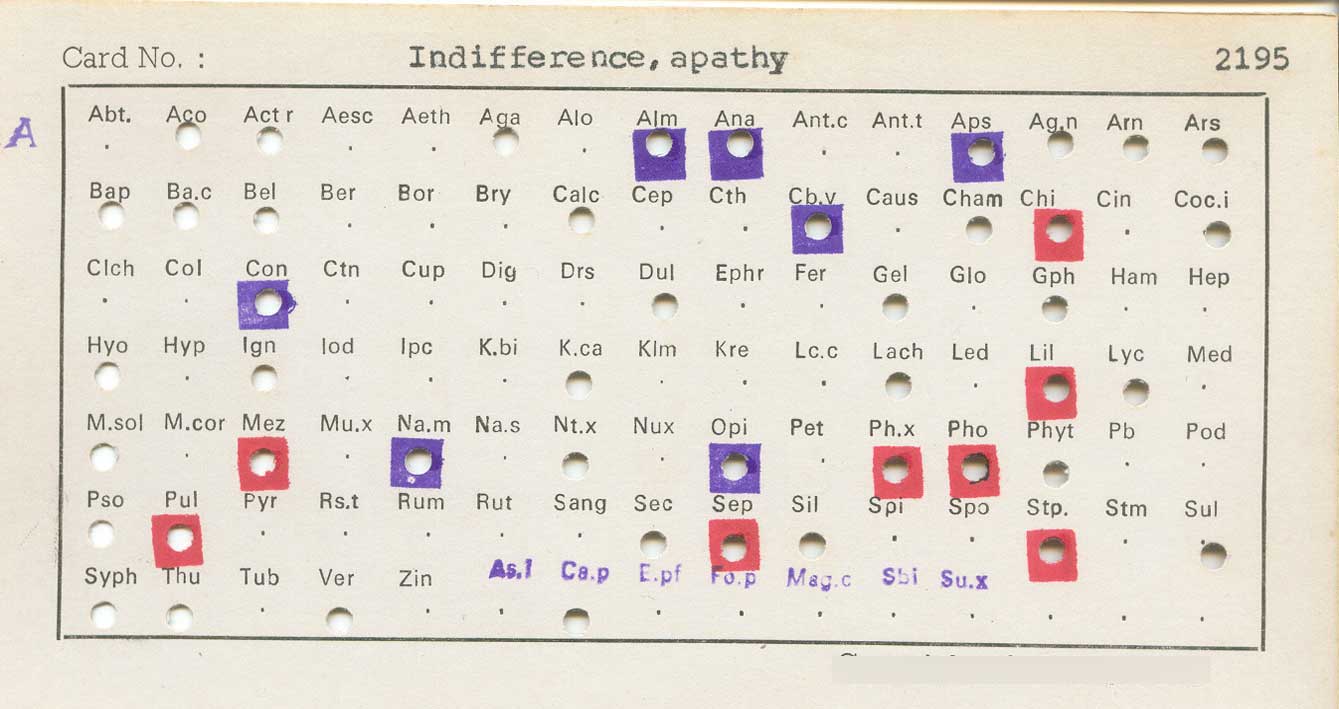
Fig. 11: A Punched Card
- First of all you should decide how many remedies you want to include in the cards. The size of the cards will depend on the number of remedies.
- I am providing 1 cm x 1 cm for each remedy so that the remedy name is clearly printed and the hole is large enough to calculate the color grading.
- I am not in favor of printing code numbers of the remedies as followed by some card designers.
- Then you should decide on the number of rows and columns to accommodate the remedies. I am giving the size of my first card set.
- I wanted to include 100 remedies; so I arranged them in 15 columns and 7 rows.
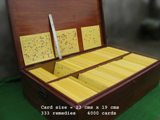
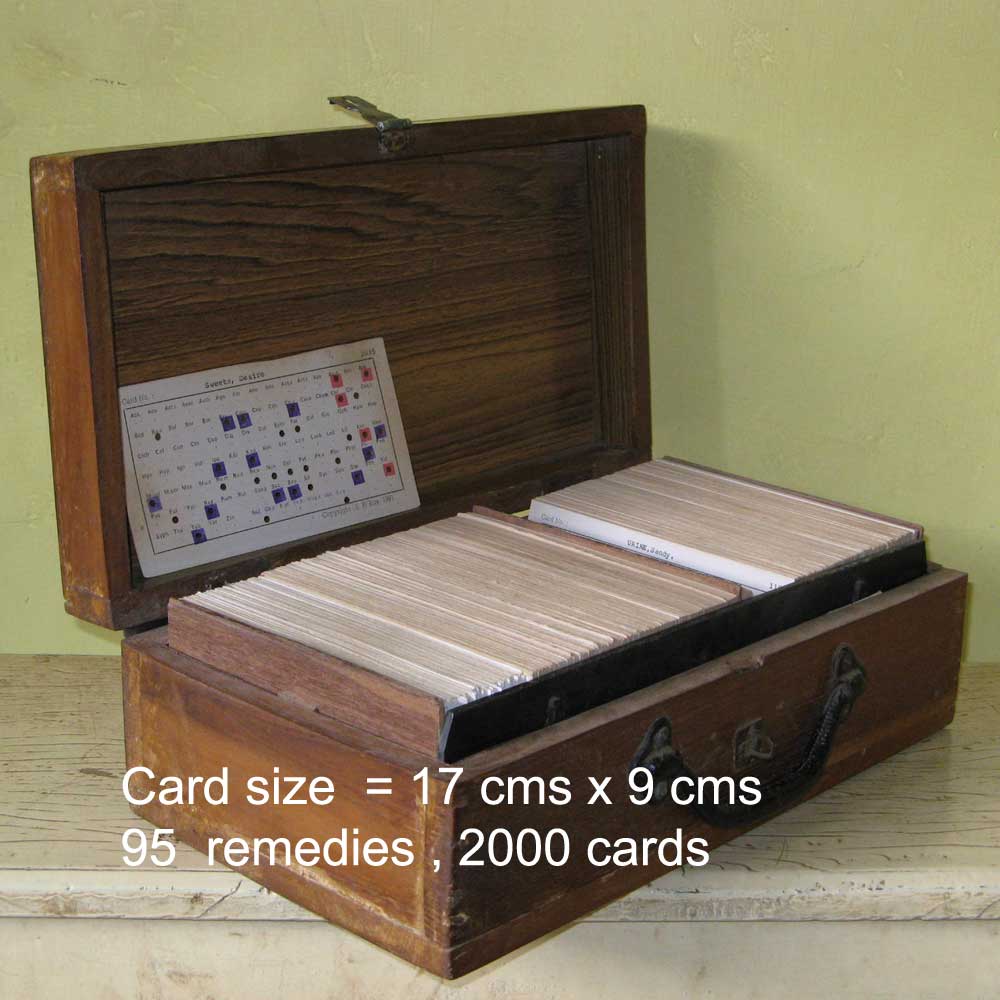
- I printed 95 remedies on the cards and left 10 spaces blank for future inclusion (fig.11).
- You should leave 1 cm border on four sides so that overall size of the card becomes 15cms+2cms = 17 cms and 7cms + 2cms = 9 cms. i.e., 17cms x9cms.
- The layout can now be given to a local printing press; either letterpress, offset or screen-printing. The important point to be observed while printing is that all cards should be cut to exactly same size and the cards should be placed at exactly the same place while printing.
- This ensures that the position of the remedies on the card is maintained constant with respect to the edges of the card.
You can print 2 to 3 thousand cards. You should first make cards from ‘Generalities’ like hot, chilly, warmth agg. pressure amel., morning agg. etc. Then you can make cards from locations, especially pain at locations. It is better to choose large, general rubrics so that all remedies are included. You should observe what type of patients you are treating, which symptoms they are having and then make the cards. You can go on adding cards as you expand your practice. If you find that you are dealing with more rheumatic cases, then you should make cards on all rubrics related to this complaint. I have found that around 1000 cards are enough to deal with a large variety of cases.
Step 2: Fabrication of Card Holder Frame
This work may be done before or after getting printed cards from the press. This step involves fabricating the Card Holder Frame for the cards. You need a G.I sheet (Galvanized Iron) of at least 1 mm thick, the thicker the better, but making holes in the thicker sheet is slightly more difficult. Please note that the sheet should not be stainless steel or other varieties of steel because holes cannot be drilled on those sheets by ordinary drill machines. The sheet should not be aluminum because this metal is softer than the Punching Tool and therefore the hole will become wider and holes will not be perfect after few cards are punched. For the card size 17 cms x 9 cms, the sheet size should be 20 cms x 10 cms. Shops do not sell such a small piece of sheet. You can get it from steel water tank makers or scrap dealers. Steel gate and door fabricators may help in this case. If more persons decide to make, then they can buy a large piece from a store.
The next material required is the clear plastic sheet called Perspex; widely used in decoration, sign board etc. This should be around 3mm thick or more and of same size as G.I sheet. The function of this transparent sheet is to show the remedy name on the cards where the hole is to be made and to guide the Punching Tool to move vertically. You should now cut both sheets to same size after fixing by nut and bolt. Any sheet metal mechanic or helper can do the job. Mechanics working in technical schools and colleges may also help.
The procedure is:
- Make holes on left, right and bottom sides to fix the sheets together with nuts and bolts,
- Mark the points where holes are to be made,
- Drill holes accurately at every remedy,
- Open the nuts and bolts,
- Put aluminum spacers with holes at proper places,
- Retighten the nuts and bolts- and the Card Holder Frame is ready. Care should be taken to see that the plastic sheet does not break while drilling holes.
Step 2: Fabrication of Punching Tool.
I made the punching tool from a motorcycle spoke. The spoke end should be sharpened with a small round file so that a channel-shape is created at the end. The diameter of the round file should be same or less than the spoke diameter. When this end is pushed inside the hole, with card inside frame, a round hole is made. The small rod can be pushed inside an old pen or some plastic or wooden rod to work as handle of the tool. I put it inside a use-and-throw ball-point pen. The Punching Tool is of same size for all card sizes. The diameter of the Punching Tool and the drill bit is 3 mms to 3.5 mms.
Some points to be noted before starting the job:
- The title of the rubric should be written before punching so that there is no confusion afterwards. I used a typewriter to do this. The data source may be written at the back of the card.
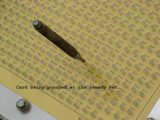
- While punching, the tool should be pushed strictly vertically otherwise the hole will become wider and future holes will not be perfect. The hole in the card is made by shearing force as is done in scissors. If the Punching Tool moves loosely inside the frame, then the edges of punched hole will be ragged ( Fig.20)
- The holes in the cards will be perfect if the cards are dry. If the cards are not perfectly dry or if you are doing the job in a rainy season, then you can press an electric iron on the card before punching, to remove moisture from the cards.
- You can use a larger Card Holder Frame to hold smaller cards by putting some obstructions horizontally and vertically so that the small card, when put inside the frame, does not drop inside but remains in a particular place for punching. You can use similar aluminum flats, which you use on bottom and sides of the frame, to provide obstruction. These should be fixed with nuts and bolts so that they do not shift while punching.
- Once assembled, you should not open the Card Holder Frame components afterwards; otherwise the alignment may be disturbed. If you want to open in future, keep a reference card with all the holes punched so that you can use this card to realign the frame.
- You should handle the cards with care. You should not bend or fold the cards. I have been using a set made out of drawing sheet, used by engineering students, for last 15 years without any problem.
- You should make a list of cards and keep in the consulting room. The list should be alphabetical. The card numbers may not be as per alphabetical rubric list. But the cards should be kept in the box serially so that you can remove and replace quickly. While removing a card, keep a plastic or paper strip in the vacant place so that you replace the cards in the original position quickly
- The holes drilled should be exactly the size of the Punching Tool. It is better to test the drill bit size and the Punching Tool before drilling all the holes finally so that mistakes can be prevented. The job should be held securely by a vise while drilling otherwise holes will not be accurate. The drill bit should not have any play otherwise the hole will be wider than the bit and punching cannot be done perfectly. A very good bench drilling machine should be used. Hand held drilling machine should not be used to drill the holes.
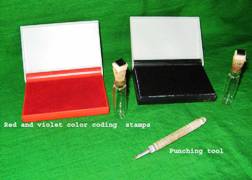
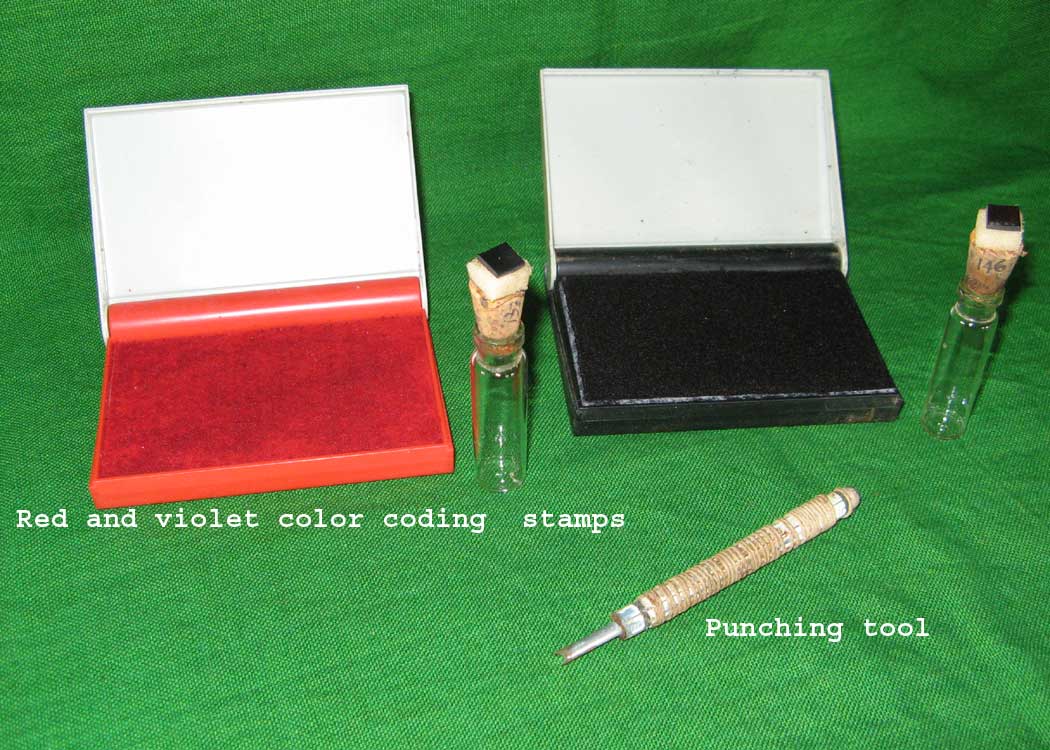
Fig. 21: Punching tool with
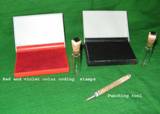
Violet and Red Coding Stamps - You can color code the cards by using a hand made rubber stamp. To prepare the stamp, cut a rubber piece from an old two wheeler tube, about 7mms x 7mms size, fix it on one end of wood or plastic rod. You can fix it on the cap of one drachm homeopathic phial. Color coding can be done by using this stamp with red and violet stamp pad. Separate stamp should be used for separate color (Fig. 21)
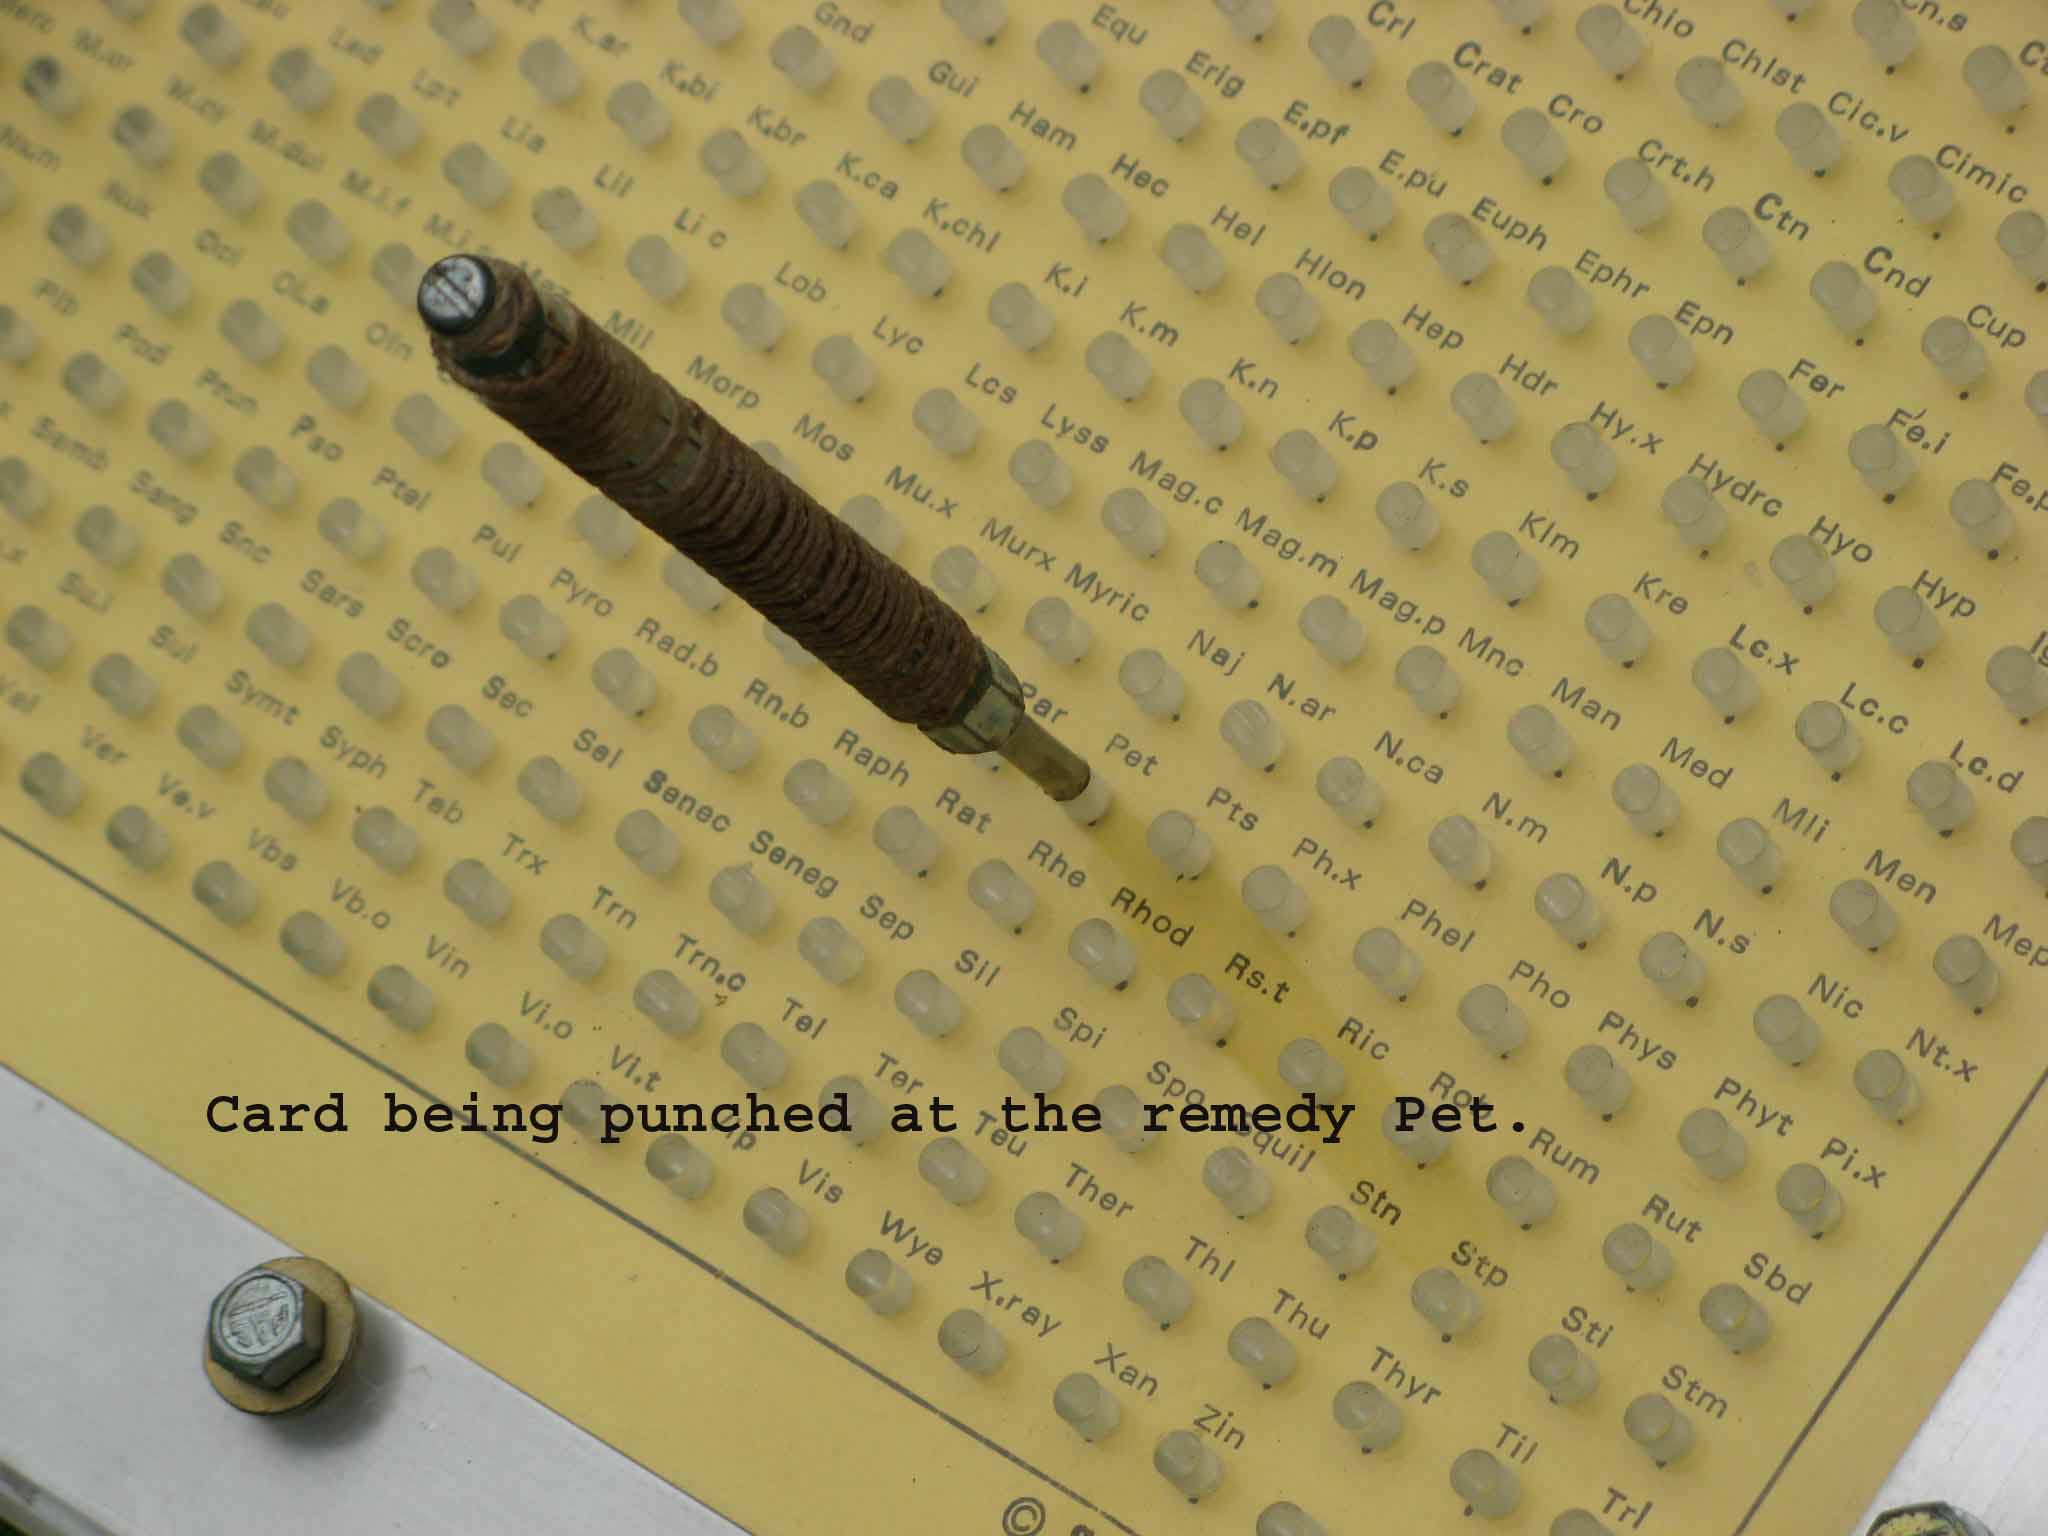
Fig. 20: Card Being Punched at Remedy Pet
Diagrammatic Steps in Developing a Punched Card System
Click on the Image to see a Bigger and Clearer Image

Illustrative example:
I am giving one example of use of punched cards in practice. If we study the case studies of masters, we find that most of them considered ‘hot’ or ‘chilly’, and ‘desires’ and ‘aversions’ as ‘eliminating rubrics’. I invariably apply this hint in practice and get very good result. However, a lot of cross examination is required to establish that the symptoms are genuine. Most patients do not realize the importance of the ‘eliminating symptoms’ and answer casually that they ‘desire sweets’; but on cross examination clarify that they like sweets made from milk, not made from flour. I do not consider ‘Desires, sweets’ of use in such a patient. I consider the symptom ‘Desires, sweets’ if the patient enjoys the sweet taste irrespective the item. Similarly, in my area, I consider a patient to be ‘chilly’, if he can sleep comfortably during power failure in summer - without fan. Practical items of food and environmental conditions should be cited as examples to get the genuine symptoms from the patient. A person may like pickles but not tamarind. I do not consider such a person to have ‘Desires, sour’. Selecting and evaluating symptoms differ from person to person. I have given my way of collecting symptoms,
Case 1:
Let us take the case of a lady, my friend’s wife, who suffered from chronic headache for last 4 years. During one of my visit to their house she casually asked me if I could cure her headache. I said I could try. I found her to be chilly, craving sour foods and the pain was located on left side. If we combine three punched cards and hold one over the other in the above sequence corresponding to the three symptoms, we get the reading as follows.
If we displace each card horizontally, say by 1mm, so that they are not in register“Fig.15”, we can calculate the weightage directly. Red stands for 3, blue for 2 and no color is 1.It may be noted that yellow is the base color of the card and has a value of 1. The result is Alm.3/3, am.m.4/3, arn.4/3, ars.6/3,bel,5/3.bry,5/3.calc,7/3,carb.v.5/3,cham.7/3, chin.5/3,con.5/3, fer.6/3, ign.6/3, kali. c.7/3, lach.6/3, lyc.4/3, nat.m.5/3, phos.5/3, plb.4/3, psor.4/3, rhus. tox.5/3, sep.8/3, sul.8/3, and thuj.4/3. I may add that if the case is repertorized by a computer, the result will be quite similar; you will find top 10 to 15 remedies will be from this 24 remedies group.
The colors red, red and blue attract your attention instantly and the highest scoring remedies are Sepia and Sulphur. I do not usually start the case with Sulphur.I gave her a single dose of Sepia 30.She had profuse discharge from the nose for 2 days and she was a completely changed lady within a week. My friend later told me that she has improved a lot in both mental, emotional and physical levels considerably. Her headache was gone 4 hours after taking the remedy.
Thousands of homeopathic doctors who are working sincerely are getting such results routinely. They do not have time to publish their results or boast their achievements in the seminars for which many patients are not able to contact them and get their help. Practice of homeopathy requires continuous study of classical literature, sincere effort, dedication, thorough case taking and analysis of failures. In my opinion, analysis of failures is the best teacher one can have. One analysis of a failed case will make the homeopath succeed in ten cases in the future. One can analyze his failures only if he works scientifically and systematically. Homeopathic punched cards are very useful to work this way.
Your Comments